Receive NRF24 traffic with TI CC2543/CC2544
Posted by hakanl in Uncategorized on May 5, 2015
Summary
This article describes how to configure a Texas Instruments CC2543 or CC2544 radio to receive traffic from a NRF24L01+ chipset.
Tools
- TI CC2543/CC2544 development kit
- 2x Arduino Uno
- 2x Nordic Semiconductor NRF24L01+ from Amazon
- Example code running on Arduino to send a known packet between two NRF24s.
Set up
I used the RF24 library and the included sample to send a known packet between two NRF24L01 nodes. The sample code is linked above. I basically configure it on the network address, address with, data rate as I want to mimic on the TI chips, then send a 10 byte packet with data that’s easy to find in a bitstream (0x55, 0xAA, will be alternating 010101010) since we may not capture the data aligned exactly on a byte level.
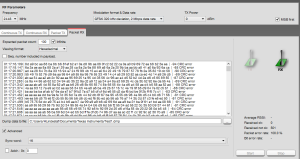
Once I had the two NRF24 nodes communicating I set up the CC2543-CC2544 DK with the SmartRF Studio 7 under Packet RX.
The key to get it to capture the NRF24 traffic is in all the register settings, to make it behave like the NRF24 when it comes to sync words, packet format, etc. I’ll list out all the registry settings that are relevant here.
How to create a signed Windows 8 driver for USB Ir Toy
Posted by hakanl in Uncategorized on April 21, 2015
As part of a home automation project I’ve been testing different infrared receivers/transmitters. One inexpensive USB-based transceiver is the Usb Infrared Toy (v2): http://dangerousprototypes.com/docs/USB_Infrared_Toy
This uses the Microchip PIC 18F2550 microcontroller which acts as a virtual USB serial port. The problem is that the included driver isn’t signed so it can’t be used in Windows 8.x. Various people have suggested to disable signature checking in Windows, but that’s both risky and complicated. I wanted to go the proper route instead, which is to sign the driver with a certificate. A real certificate is about $180/year (code signing certificate) and I didn’t wan to pay that, so the alternative is to use a self-created certificate and ask Windows to trust that (which is a normal Windows process, doesn’t require a diagnostic boot, etc). I wanted to document the steps so it can be reproduced as well for other drivers.
Get the driver inf-file in order
First step was to clone the repository so I can commit my changes. The creators of Usb Ir Toy are currently using code.google and have all their projects in one repository. Since code.google is going away and to make it easier to work on this project I copied out the Usb Ir Toy folder and put it up on github instead, here: https://github.com/HakanL/UsbIrToy. The next task was to update the inf-file so it would be compatible with Windows 8.x and go through the signature check (using inf2cat). I took the latest Microchip example driver inf file (http://www.microchip.com/pagehandler/en-us/devtools/mla/home.html) and just copied the relevant settings over. Note that for devices like these (that emulate a serial port) the “driver package” doesn’t actually include the driver, it just consists of an inf-file that describes the device and then it references the built-in usbser driver that’s included with Windows. But you still have to sign the inf-file so Windows can trust it. Here’s the updated inf-file: https://github.com/HakanL/UsbIrToy/blob/master/inf-driver/mchpcdc.inf. And to generate the cat-file from the inf file I used the command tool inf2cat from the Windows Device Driver kit (https://msdn.microsoft.com/en-us/windows/hardware/gg454513#drivers) using the instructions from here https://msdn.microsoft.com/en-us/library/windows/hardware/ff547089(v=vs.85).aspx to come up with this command line:
Inf2Cat.exe /driver:. /os:6_3_X86,6_3_X64,Server6_3_X64,8_X64,8_X86,Server8_X64,Server2008R2_X64,7_X64,7_X86,Server2008_X64,Server2008_X86,Vista_X64,Vista_X86,Server2003_X64,Server2003_X86,XP_X64,XP_X86,2000
Note that the /driver parameter is pointing to the directory where the inf file is, not the file itself. I used . since I was already in that folder. This command runs some signability tests and then outputs the cat-file. From there you need to sign that file before it’s ready to used as a device driver.
Hacking the Harmony RF Remote
Posted by hakanl in Uncategorized on April 16, 2015
Why
For my home automation system I’ve been looking for a sleek universal remote. Some of the requirements are:
- RF (my A/V cabinet is in the garage)
- Great ergonomics
- Inexpensive (<$100)
- Not too many buttons
- Use regular batteries so I don’t have to put it back in a charging station after use
- High WAF (Wife Approval Factor)
- Ability to integrate it to my DIY home automation system
I finally found it, the Logitech Harmony which is part of their Ultimate package ($130+), but you can buy it as an add-on for $30 (http://www.amazon.com/Logitech-Harmony-Companion-Ultimate-915-000245/dp/B00LTKGFDQ). After some research I figured out that it’s using the popular NRF24LE1 chip (NRF24L01+ radio plus a 8051 MCU). That is totally hackable!
My ultimate goal is to attach a cheap NRF24L01+ chip (http://www.amazon.com/nRF24L01-Wireless-Transceiver-Arduino-Compatible/dp/B00E594ZX0) to my home automation system (based on Raspberry Pi) and use this remote to control my A/V equipment.
I figured there are two phases to this goal, phase one is to determine the RF protocol and ids used to send packets between remote and hub. Phase two would be to understand the packet protocol and see if there are any software-based frequency hopping, encryption, etc.
High Precision Timer in .NET/C#
Posted by hakanl in Uncategorized on January 29, 2013
Here’s a high-precision timer I wrote. I get roughly <1ms avg precision on 25ms interval. But if Windows is busy it may come in late. It’s fairly lean on CPU utilization. Feel free to use. It uses Sleep(1) when the next tick is more than 15ms away and then SpinUntil (which yields as needed) to keep CPU usage at bay. Uses .NET4 features.
This file contains bidirectional Unicode text that may be interpreted or compiled differently than what appears below. To review, open the file in an editor that reveals hidden Unicode characters.
Learn more about bidirectional Unicode characters
| using NLog; | |
| using System; | |
| using System.Linq; | |
| using System.Threading; | |
| using System.Threading.Tasks; | |
| namespace Animatroller.Framework.Utility | |
| { | |
| public class HighPrecisionTimer : IDisposable | |
| { | |
| public class TickEventArgs : EventArgs | |
| { | |
| public TimeSpan Duration { get; private set; } | |
| public long TotalTicks { get; private set; } | |
| public TickEventArgs(TimeSpan totalDuration, long totalTicks) | |
| { | |
| this.Duration = totalDuration; | |
| this.TotalTicks = totalTicks; | |
| } | |
| } | |
| protected static Logger log = LogManager.GetCurrentClassLogger(); | |
| public event EventHandler<TickEventArgs> Tick; | |
| protected CircularBuffer.CircularBuffer<int> tickTiming; | |
| protected CancellationTokenSource cancelSource; | |
| public HighPrecisionTimer(int interval) | |
| { | |
| log.Info("Starting HighPrecisionTimer with {0} ms interval", interval); | |
| if (interval < 1) | |
| throw new ArgumentOutOfRangeException(); | |
| System.Diagnostics.Trace.Assert(interval >= 10, "Not reliable/tested, may use too much CPU"); | |
| cancelSource = new CancellationTokenSource(); | |
| // Used to report timing accuracy for 1 sec, running total | |
| tickTiming = new CircularBuffer.CircularBuffer<int>(1000 / interval, true); | |
| var watch = System.Diagnostics.Stopwatch.StartNew(); | |
| long durationMs = 0; | |
| long totalTicks = 0; | |
| long nextStop = interval; | |
| long lastReport = 0; | |
| var task = new Task(() => | |
| { | |
| while (!this.cancelSource.IsCancellationRequested) | |
| { | |
| long msLeft = nextStop – watch.ElapsedMilliseconds; | |
| if (msLeft <= 0) | |
| { | |
| durationMs = watch.ElapsedMilliseconds; | |
| totalTicks = durationMs / interval; | |
| tickTiming.Put((int)(durationMs – nextStop)); | |
| if (durationMs – lastReport >= 1000) | |
| { | |
| // Report | |
| log.Debug("Last second – avg: {0:F1} best: {1} worst: {2}", | |
| tickTiming.Average(), tickTiming.Min(), tickTiming.Max()); | |
| lastReport = durationMs; | |
| } | |
| var handler = Tick; | |
| if (handler != null) | |
| handler(this, new TickEventArgs(TimeSpan.FromMilliseconds(durationMs), totalTicks)); | |
| // Calculate when the next stop is. If we're too slow on the trigger then we'll skip ticks | |
| nextStop = interval * (watch.ElapsedMilliseconds / interval + 1); | |
| } | |
| else if (msLeft < 16) | |
| { | |
| System.Threading.SpinWait.SpinUntil(() => watch.ElapsedMilliseconds >= nextStop); | |
| continue; | |
| } | |
| System.Threading.Thread.Sleep(1); | |
| } | |
| }, cancelSource.Token, TaskCreationOptions.LongRunning); | |
| task.Start(); | |
| } | |
| public void Dispose() | |
| { | |
| this.cancelSource.Cancel(); | |
| } | |
| } | |
| } |
Something for next science fair project
Posted by hakanl in Uncategorized on January 3, 2013
http://www.dataq.com/products/startkit/di145.html
4 channel USB data logger. They are even giving away free loggers for 4th graders and up.
Video of the Halloween display
Posted by hakanl in Uncategorized on November 1, 2012
Not great quality, it’s hard to shoot in the dark, with fog. But hopefully you’ll see some details of the display. We had a blast last night with a lot of kids (and adults) enjoying it! Many screaming, some crying 🙂
DIY Pressure Mat
Posted by hakanl in Uncategorized on October 29, 2012
Just a picture of the pressure-sensitive mat I created for halloween. It’s placed in the stairs leading to our porch. When visitors step on it it triggers the main sequence. I pretty much followed the instructions on this link: http://supersoda.com/detail.php?id=00000000036). It seems flaky with just the cardboard keeping the distance between the foil, but it’s actually working very well.
Overall functionality – Halloween 2012
Posted by hakanl in Uncategorized on October 22, 2012
Main functional blocks:
- Custom controller-application written in C#, running on my PC.
- Audio-player application, also written in C# using managed DirectX (www.sharpdx.org) and XAudio2. Multi-channel/Polyphonic.
- I/O Expander created using a Parallax Propeller (8 core microprocessor, 80 MHz), communicating with PC over serial/USB port. Handles all Input/Output like pressure mat input, relay-control for spider, PWM and quadrature encoding for skeleton motor, plus DMX light control.
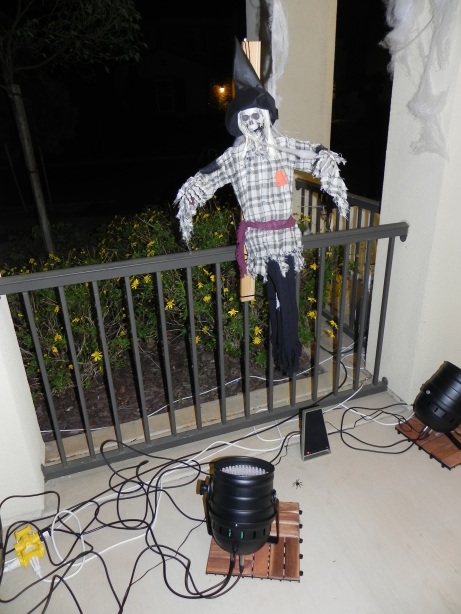
- DMX-controlled light fixtures and dimmer pack
- Spider lift using pneumatics (air cylinder powered by air compressor and solenoid valve)
- Skeleton on track in ceiling
- When no visitors are present the system will play random tracks from this CD. Some of the lights will flicker/pulsate.
- Visitor walks up the stairs leading to our porch. A DIY pressure mat (http://supersoda.com/detail.php?id=00000000036) triggers a digital input on the Propeller controller, which sends a command over a serial port to a PC running my custom C# application.
- All lights turn off, a sound effort of a creaking door is played, mixed with the violin screech sound from the Psycho movie.
- After a few seconds the spider is coming down and a red strobe that is pointing to it will flash. The spider is then raised again.
- Flashing multi-color strobe light directed at stationary skeleton and another sound effect played
- After a few moments another flashing multi-color strobe light turns on, combined with audio.
- Finally a laughter is played, white strobe light is going and the fish line mounted skeleton is moving towards the visitor! The skeleton will stop after a few feet and then go back after a few seconds.
- The visitor can now grab some candy. The system resets back for another visitor after a minute to allow some time to step off the porch without triggering another sequence.
Sample code from main controller C# application:
audioPlayer.PauseBackground();
audioPlayer.PlayEffect("Door-creak");
instance.WaitFor(TimeSpan.FromSeconds(2));

audioPlayer.PlayEffect("Violin screech");
blinkyEyesLight.JumpToLevel(0);
instance.WaitFor(TimeSpan.FromSeconds(2));

audioPlayer.PlayEffect("Scream");
spiderLight.SetStrobe(Color.Red, 200);
spiderMover.SetOutput(true);
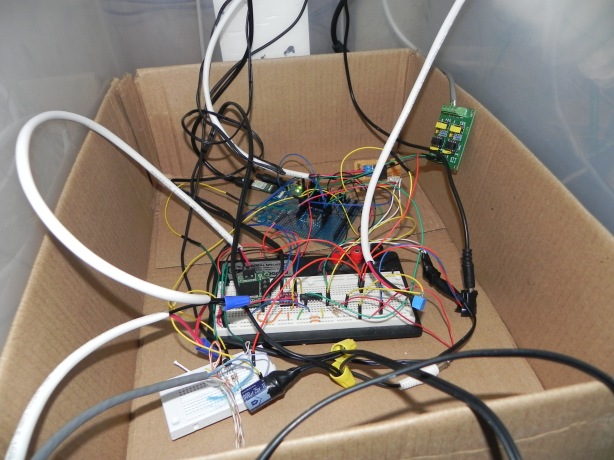
I/O Expander with DMX connector, breadboard for PWM motor driver, digital input connections and relay board
Spider Pneumatic Lift – Halloween 2012
Posted by hakanl in Uncategorized on October 22, 2012
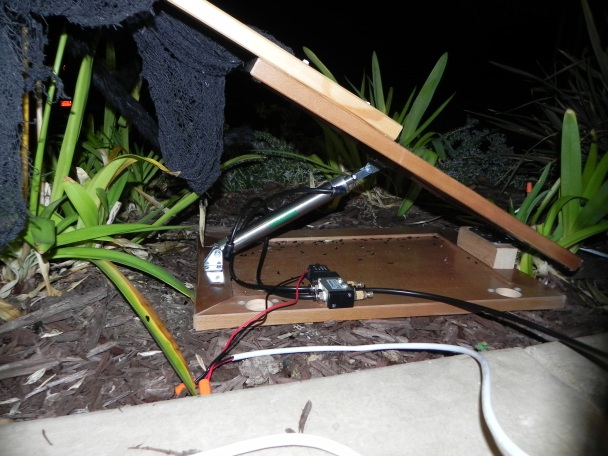
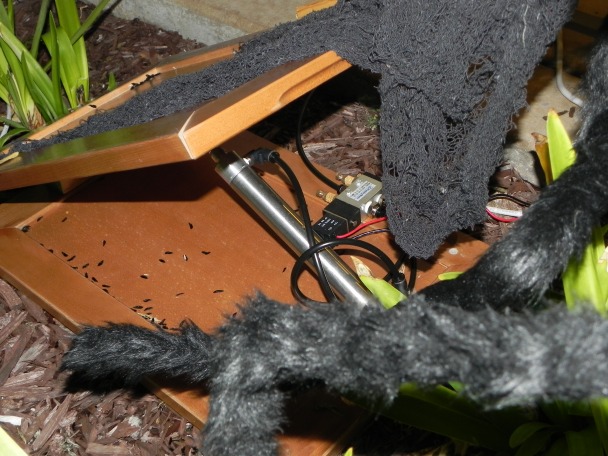
Time to write about some details about our Halloween 2012 project. First off is the Spider Lift. This is a simple mechanical design, basically a hinged wedge driven by an air cylinder. The double-acting air cylinder is hooked up to a 5-port 4-way 12v solenoid valve with speed-adjustable mufflers. This valve either directs air to the top or bottom of the cylinder, so it will go to either position with pressure force. Applying 12 volts will send the air to the opposite side. I have the resting position at the top, so when the spider is triggered it will come down/towards the visitor, while a red strobe flashes and scream sound effects are played. Most equipment from http://www.frightprops.com. Yes, those are old cabinet doors 🙂
Halloween 2012
Posted by hakanl in Uncategorized on October 22, 2012
Some of the highlights of our 2012 Halloween installation:
- Custom-written C# controller on PC
- Network Audio Player using managed DirectX (XAudio2)
- Propeller/Spin IO Expander (handles all IO including DMX)
- Custom SPIN application with support for DMX, Relay, Inputs, Motor PWN and Quadrature Encoder
- Pneumatic lifter for spider, triggered by solenoid valve
- DMX lights: 4x LED RGB-lights, 1x LED strobe light, 1x dimmer pack 4chn
- Skeleton on track in ceiling, controlled by motor and quadrature encoder (built in lego)
- DIY pressure mat in stairs
- Background music and multi-channel sound effects
More details to come soon!
